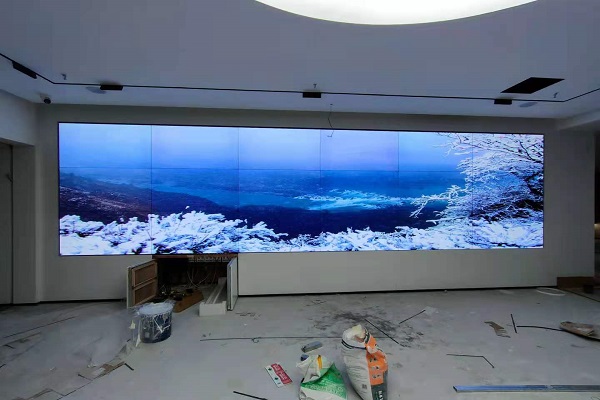
LCD Video Wall Installation Guide
The LCD video wall unit can be used as a single display or spliced into a super large screen. According to different usage requirements, the graphics processor can realize the function of making the screen larger or smaller: single-screen multi-screen display, single-screen single-screen display, any LCD video wall, image splicing, full-screen splicing, optional compensation or covering of image borders, support for digital signal roaming, zooming and stretching, cross-screen display, setting and running of various display plans, and real-time processing of full HD signals. About LCD video wall, its installation method is not difficult, and you need to pay attention to the following points:
1. Pre-Installation Preparation of LCD video wall:
Before installation, ensure you have the following:
LCD video wall (quantity as per project requirements)
Mounting brackets/rack (wall-mounted or floor-standing)
LCD Video wall processor/controller (for multi-screen synchronization)
HDMI/DP/DVI cables (depending on input ports)
Power cables & distribution unit (stable power supply recommended)
Level, screwdrivers, electric drill, wrench (for securing brackets)
Ethernet cables (optional, for remote control)
2. Environmental Check
Wall load-bearing capacity: Ensure the wall can support the weight (typically 10-30kg per panel).
Power stability: Use a voltage regulator to prevent fluctuations.
Ventilation & cooling: Avoid direct sunlight and ensure proper airflow.
Signal source test: Verify all input sources (PC, CCTV, etc.) before installation.
Installation Steps are follow:
1. Wall-Mounted Installation
Use a level to ensure the bracket is perfectly horizontal.
Mark drilling points on the wall and drill holes using an electric drill.
Securing the Bracket:
Fix the bracket to the wall using expansion screws.
For multi-screen setups, adjust spacing for seamless alignment.
2. Floor-Standing Rack Installation
Assemble the rack according to the manufacturer’s instructions.
Level adjustment: Use a spirit level to prevent misalignment.
Mounting the Screens:
Align each panel with the bracket/rack slots and secure with screws.
Install panels from the center outward for easier alignment.
Gap Adjustment: fine-tune the bezel gap (typically ≤3.5mm for seamless display).
Wiring & Power Connection:
1. Video Signal Connection:
Connect each panel to the video processor using HDMI/DP/DVI cables.
If using a distributed controller, use Ethernet or fiber optic cables.
2. Power Supply:
Provide independent power to each panel to avoid overload.
A UPS (Uninterruptible Power Supply) is recommended for protection.
3. Calibration & Testing
(1). Power-On Test:
Turn on each panel individually to check for display issues.
Set panel IDs (e.g., 2×2, 3×3, or custom matrix layout).
(2). Image Alignment:
Use controller software to adjust brightness, color, and contrast uniformity.
Ensure seamless edge matching without misalignment or black borders.
4. Maintenance & Care
Cleaning: Use a microfiber cloth; avoid alcohol or abrasive cleaners.
Cooling: Ensure proper ventilation to prevent overheating.
Firmware updates: Regularly update the controller for optimal performance.
5. Safety Precautions
Always install with at least two people to prevent accidents.
Avoid humid, dusty, or high-temperature environments.
Do not disassemble panels unless trained.
Installation Complete: Follow this guide for a secure and high-performance LCD video wall setup. For technical support, consult the manufacturer or a professional installer.

